The resource tile can store commonly used files from across the portal in one place. To create a resource area, when creating a new tile, select the ‘Resource’ option.
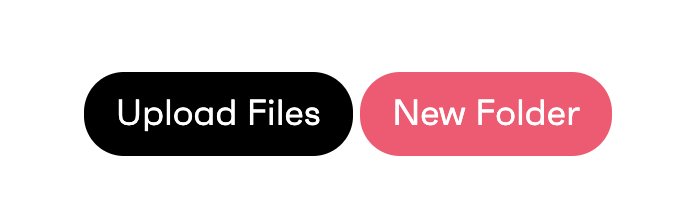
Resources can be grouped into specific folders. To create a new folder, navigate to the resource tile and select the new folder button at the top of the screen. A pop-up menu will appear, prompting you to name the folder and where it is located.
To upload a file, click on the Upload Files button, located at the top of the page. You will be redirected to a page where you will be able to upload your file. Simply drag and drop your files from your computer onto the page to upload them.
By clicking on the cog icon on a file or folder and selecting the settings option from that drop-down, opens the settings for the selected file or folder.
From the settings menu, you can:
Name/rename the resource.
Add Tags to the resource which can be linked to design guides
Add groups to view the resource
Add groups to edit and or upload resources.
Move the selected resource
To add tags to images hover over images in the resource area and from the drop-down click on settings. From this menu you will see tag in the drop-down menu where you will able to link to specific areas of the platform.
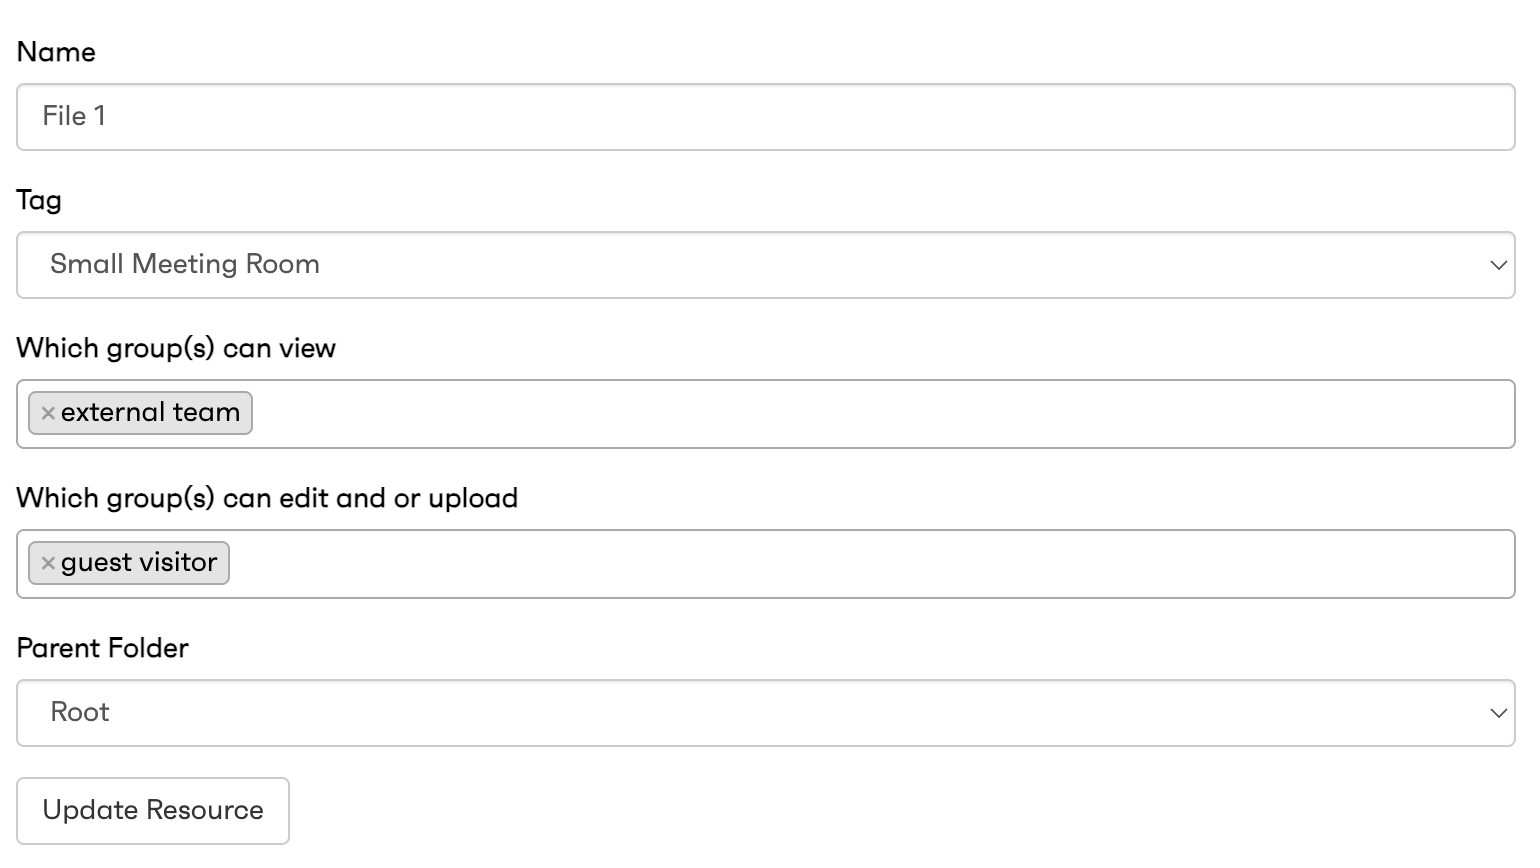
You can tag images with these options:
Workstations
Small/Medium/Large meeting rooms
Breakout
Surveys
Documents

