Workflow permissions determine which activities each role has access to on a given workflow. These roles can be created and edited from the workflow configuration page that can be accessed by navigating to the 'Workflows' page under the 'Administration' tab. This page lists all of the active workflows on the platform, select the specific workflow you would like to edit using the 'Edit’ button on the right-hand side of the screen. Navigate across to the 'Permissions' tab to view all the roles set up for the selected workflow.
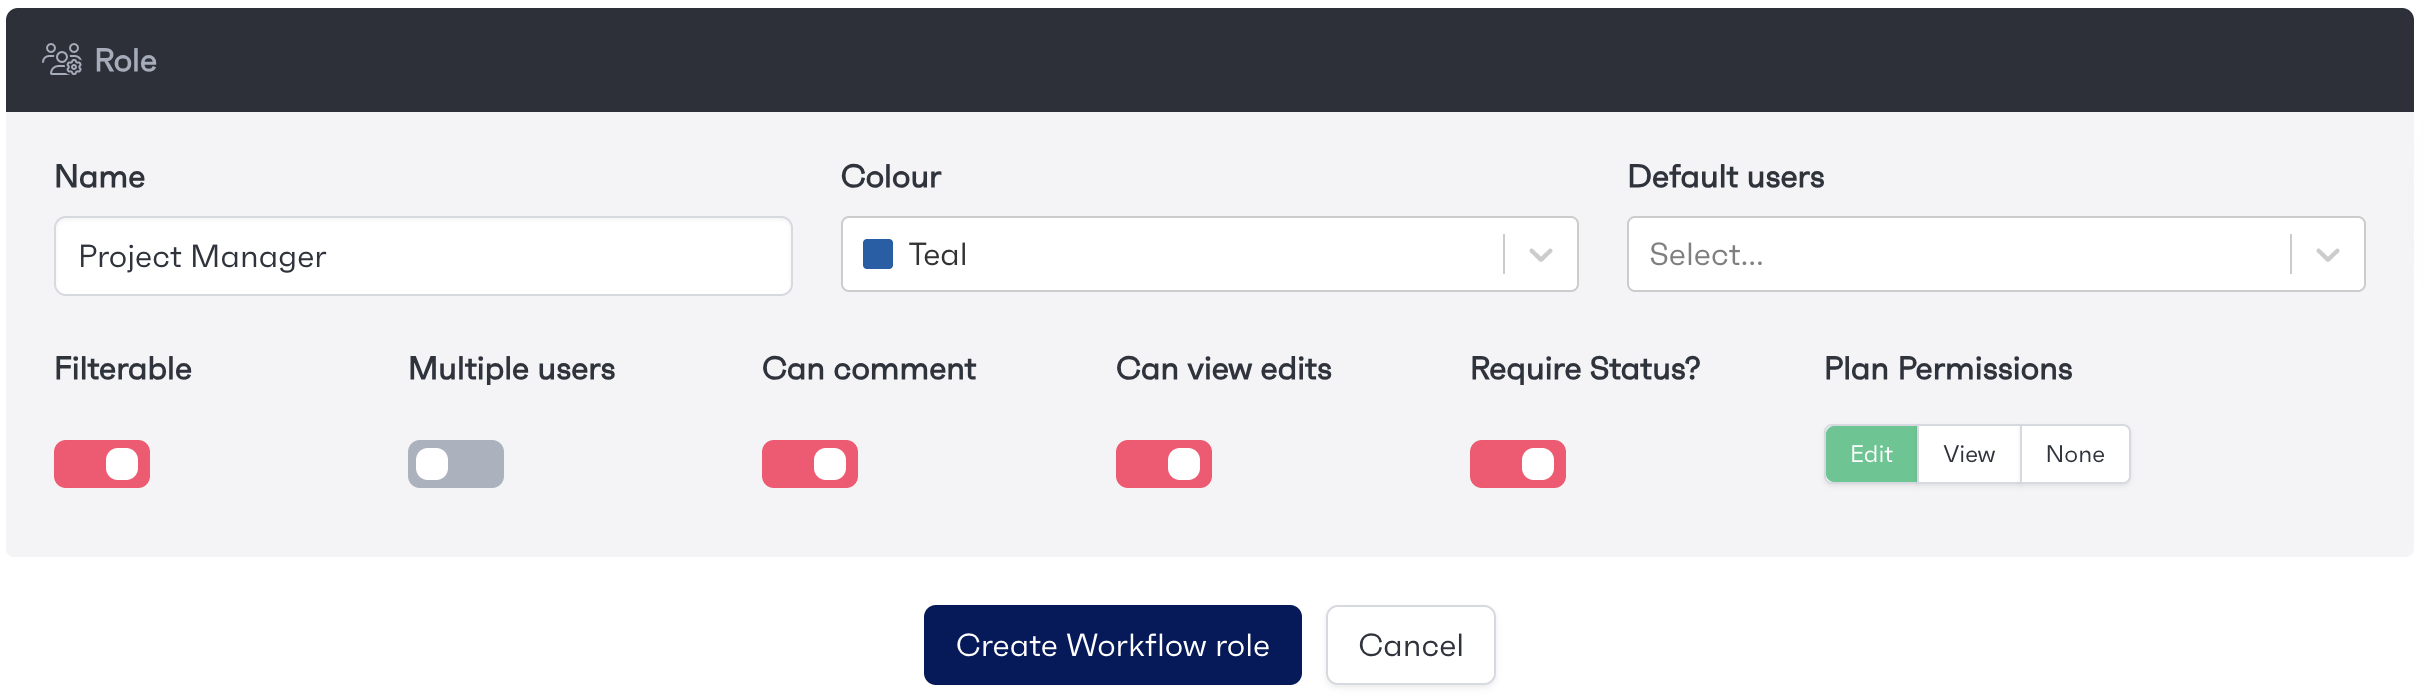
Once you have navigated to the ‘Permissions’ tab there will be an option at the bottom of the page to create a ‘New Role’. You will be required to enter some details, including, Name and Colour. The default user dropdown allows you to pre-set a user to be assigned as this role on every workflow created.
Toggles can also customise the role with different options:
Filterable - This allows the role to be filtered for on the workflow dashboard, alongside allowing it to be displayed as a column.
Multiple Users - This allows more than one user to be assigned to the role, if not toggled on, the role will be restricted to one user.
Can Comment - Allows the user the ability to comment on a workflow. This could be useful if there is an observer role and you don’t want to allow them to comment.
Can View Edits - When a user edits a workflow, the changes are posted into the activity window. This toggle allows the role to see these updates.
Require Status - Will automatically create a status for ‘Waiting On’ this role.
Plan Permissions - This sets the the permission for the Plan.
Once the role has been set up, options appear below to adjust what permissions the role has access to.
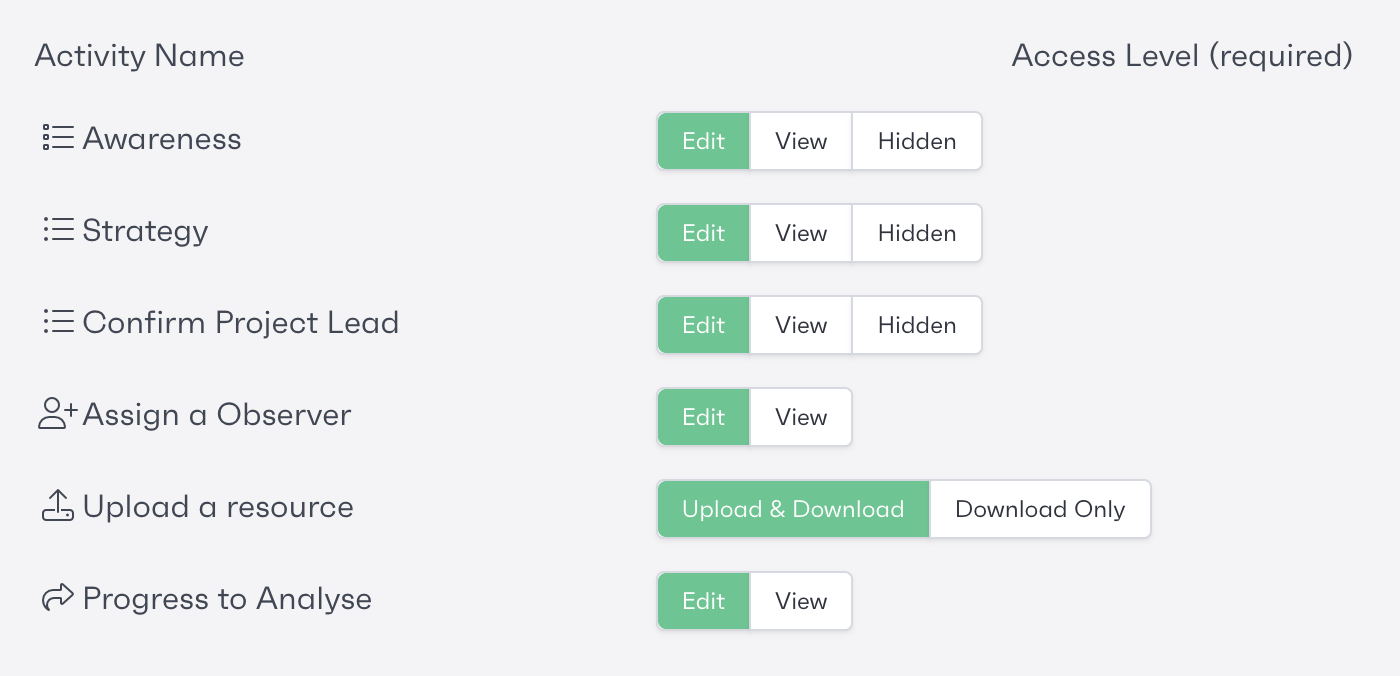
Once the role has been set up, it will be displayed in the permissions tab. You can edit what permissions the role has access to by clicking on the ‘Edit’ button. You will be able to amend any of the settings mentioned above but also adjust what activities this role has access to.
Each activity within the workflow will be listed. The “Edit“ option will allow this role to access the activity and see updates. The “View“ option will restrict the role to only see updates of the activity but they will not be able to complete it. Finally, the “Hidden“ option removes the ability to see any updates, and the user will not be able to see if it has been completed or not.
Once the workflow roles have been set up with permissions, the role will need to be configured to allow system roles to be assigned to them. You can find out more from the role guidance below.
REflow Roles
Guidance on system roles and who can be assigned to workflow roles
